
Learn the procedures, risks, and requirements of tracheostomy care.
When a patient’s breathing is either blocked or severely reduced, it may be necessary to perform a tracheostomy to deliver oxygen directly to the lungs through a hole in the neck. The entry hole and breathing tube are known as tracheostomy.
While a surgeon performs the tracheostomy, the nurse’s responsibility is typically to provide the tracheostomy care necessary to prevent infection and other problems.
Tracheostomy is one standard treatment registered nurses perform, and training provides the proper techniques necessary to master tracheostomy care. (Read this to learn about other everyday duties performed by nurses.
In this article, let’s examine the tracheostomy procedure and subsequent care.
What is a Tracheostomy?
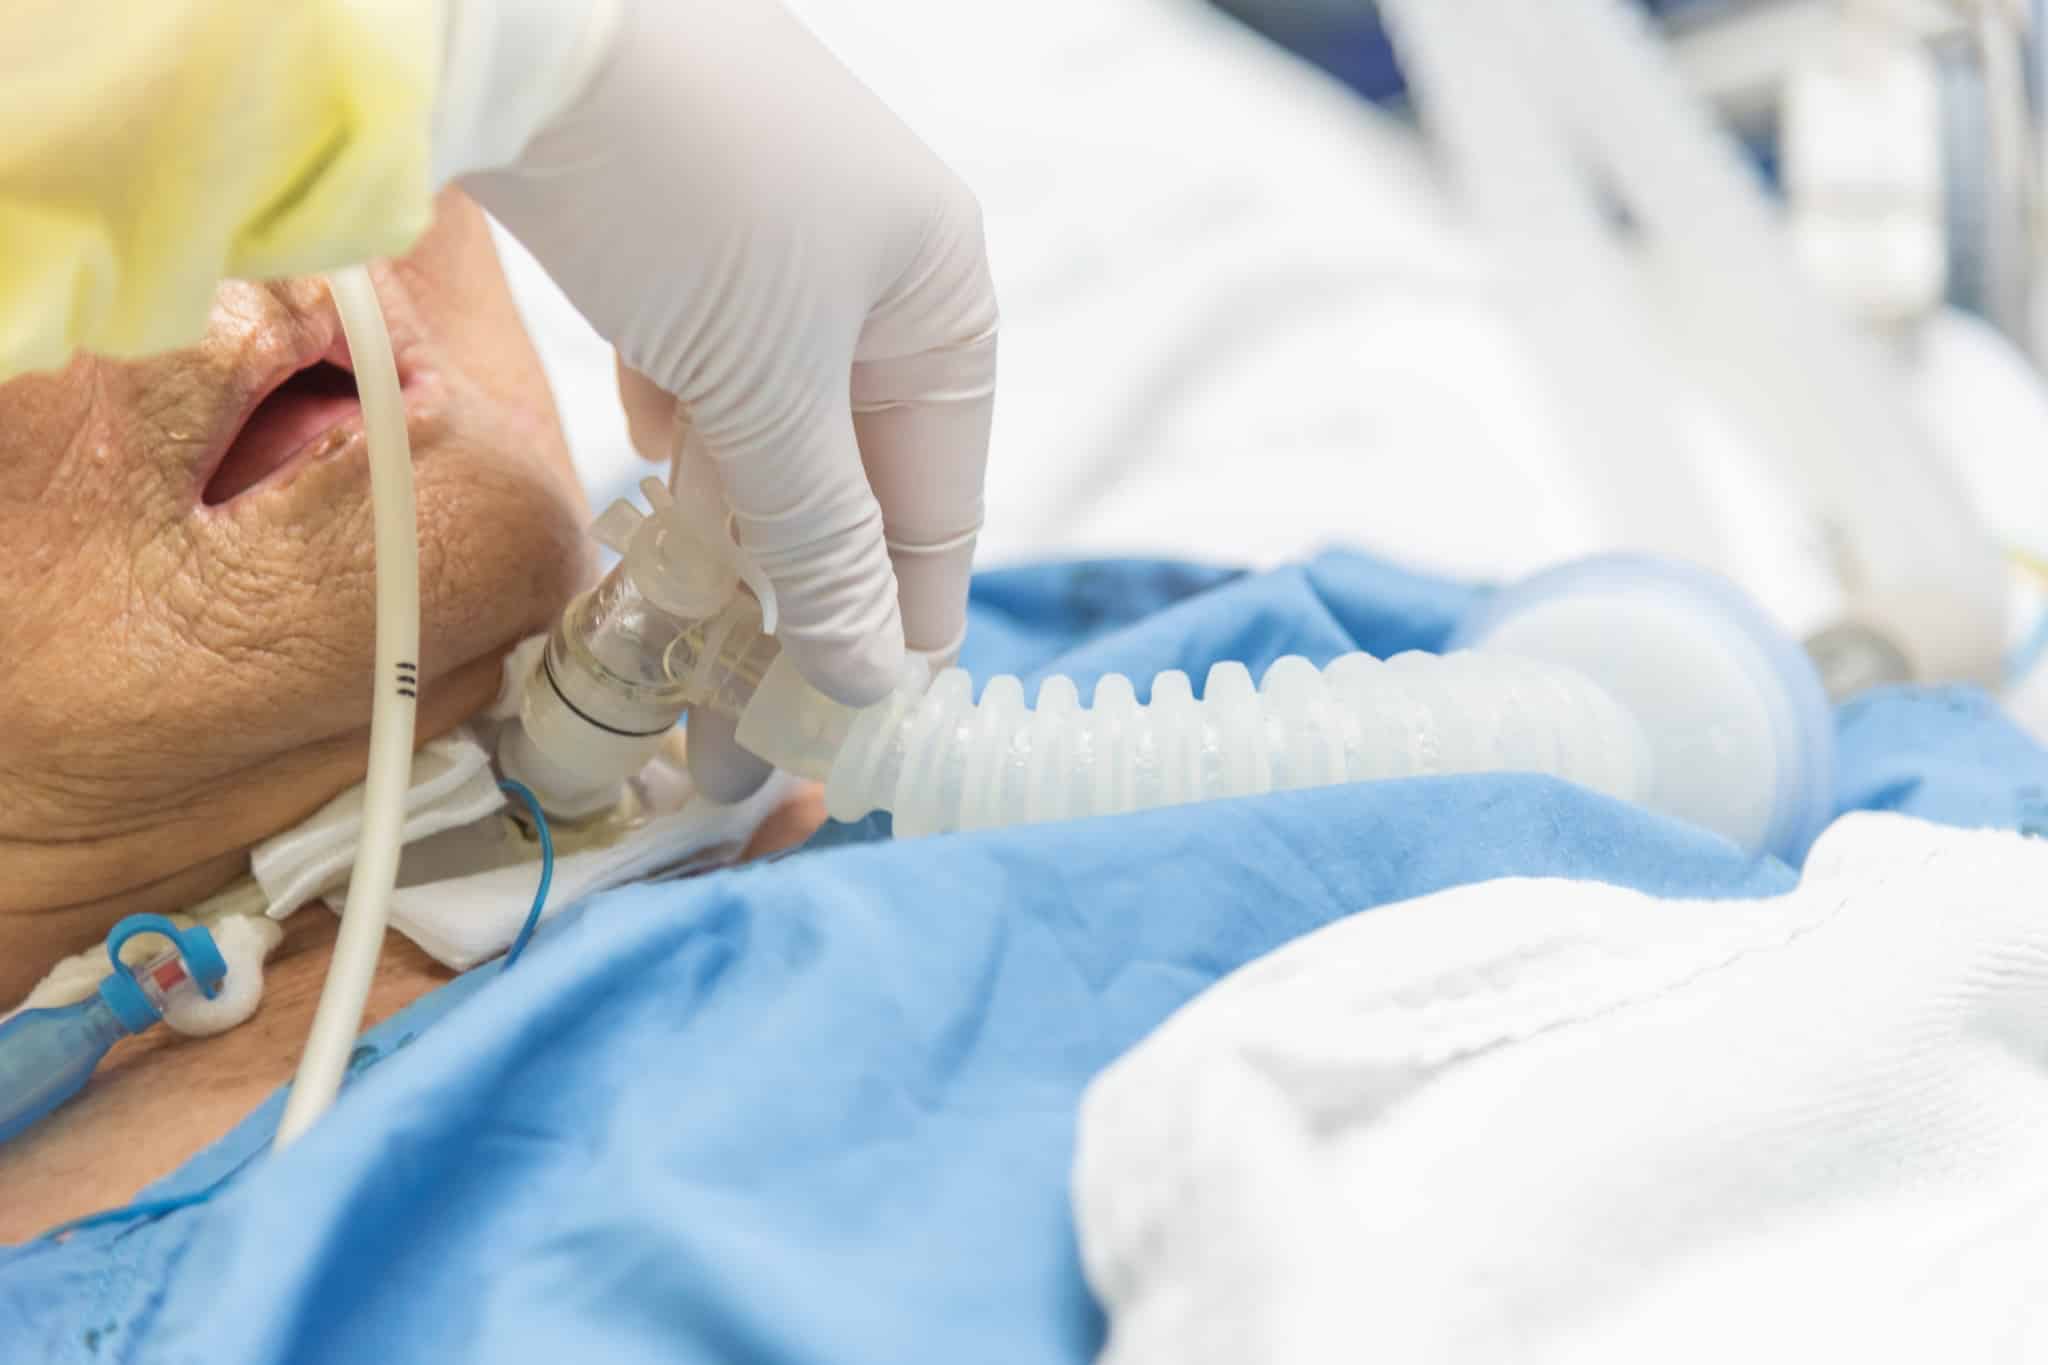
A tracheostomy is a hole created by a surgeon in the anterior (front) of the neck. The hole penetrates directly into the windpipe, the trachea. A tracheostomy tube is placed through the hole. This bypasses the patient’s nose or mouth, delivering oxygen directly into the lungs. In some patients, the tracheostomy tube is attached to a ventilator to assist breathing.
Although technically different, the terms tracheostomy and tracheostomy are commonly used interchangeably.
Why Perform a Tracheostomy?
A tracheostomy goal is simple—bypassing the airway to provide direct access to the patient’s lungs. This can be necessary after an emergency, such as a crushed trachea, disease, or other health condition that inhibits normal breathing.
Some specific situations would require a tracheostomy:
- Severe trauma to the head or neck that has obstructed the airway.
- In preparation for major head or neck surgery to assist the patient’s breathing during recovery.
- Medical situations where the patient requires a ventilator for an extended period, usually more than a week or two.
- Medical conditions that block or otherwise constrict the airway, such as throat cancer or vocal cord paralysis.
- Paralysis, neurological problems, or other conditions that preclude the patient from being able to cough up secretions from the throat, requiring direct suction of the trachea.
- Emergencies where emergency personnel are unable to place a breathing tube through the mouth into the windpipe.
How Long Does It Take to Perform a Tracheostomy?
The procedure where a surgeon, or emergency personnel, creates the hole in the front of the throat just below the vocal cords takes from 20 to 45 minutes.
As for the tracheostomy care provided by the nurse, suctioning and cleaning will be necessary every one to two hours initially. However, this will decrease after the inflammation resolves.
Who Performs a Tracheostomy?
Surgeons commonly perform tracheostomies in an operating room with the patient under general anesthesia. But there are exceptions. For instance, an EMT may perform the procedure in an emergency, and only local anesthesia would be available. Less commonly, tracheostomy may be performed at a patient’s bedside in a hospital using minimally invasive methods.
What Role Does a Nurse Play in Tracheostomy Care?
Once the tracheostomy has been performed and the breathing tube is in place, a registered nurse typically provides follow-up care. This involves keeping the incision area and the tracheostomy tube clean to prevent infection. The risk of infection is significant because the incoming air is not filtered through the mucosa that lines the throat.
It is also the nurse’s job to teach the patient how to clean and change their tracheostomy tube when there is a long-term need.
(If you’re interested in making a career change to nursing, we’ve got everything you need to know.)
What Are the Training Requirements for Tracheostomy Care?
Learning to provide tracheostomy care is a standard part of the education and training for becoming a registered nurse (RN) or a licensed vocational nurse (VN). Tracheostomy suctioning and management of the tracheostomy tube are the requisite skills.
The nursing licensure exam (NCLEX) will examine the knowledge of these skills. This exam verifies that potential nurses have the necessary understanding of the procedure and follow-up care.
This is a practice question from the NCLEX on tracheostomy:
A nurse is caring for a client with a new tracheostomy. The client has a pneumonia with a WBC count 4.6 x 10^9/L and is receiving morphine for pain control. Which of the following precautions is the priority at this time?
- A) Fall precautions
- B) Neurotrophic precautions
- C) Airborne precautions
- D) Swallowing precautions
The answer is D.
(Check out our study guide on how to pass the NCLEX-RN exam)
How is Care Provided for Tracheostomy?
A Step-by-Step Guide
The main aspects of tracheostomy care are suctioning to prevent occlusions and replacing supplies, such as the inner cannula. Suctioning is necessary due to the throat mucosa’s lack of filtering and humidifying.
Here are some basic ways nurses provide tracheostomy care.
Tracheostomy Preparation
There isn’t a great deal of preparation necessary when providing this care. Mainly your prep involves assessing the patient. You’ll want to check the respiratory status and look at oxygen saturation, depth of breath, breathing rate, and sounds in the lungs. In addition, you’ll check the pulse and blood pressure.
Next, you’ll want to check for any secretions from the tracheostomy site. Next, you’ll need to check the tracheostomy dressing for any signs of drainage. Finally, check the appearance of the incision, looking for any signs of infection.
Tracheostomy Care Steps
There are five basic aspects involved with this care:
- Suctioning the tracheostomy tube
- Cleaning the suction catheter
- Replacing the inner cannula
- Cleaning the skin around the tracheostomy
- Moisturizing the patient’s air
Suctioning
- Wash your hands and put on a pair of sterile gloves.
- Attach the suction catheter to the suction machine’s tubing.
- Suction the entire length of the tracheostomy tube. Limit this time to no longer than 10 seconds, as longer suction can cause shortness of breath in the patient.
- Remove the suction catheter with a rotating motion, as this helps suck up secretions on all sides of the trachea and the tracheostomy tube.
- If you feel more suction is needed, repeat the process.
Cleaning the Suction Catheter
- Wipe any secretions from the outside of the suction catheter with dry gauze.
- Rinse secretions inside the suction catheter by suctioning water through it.
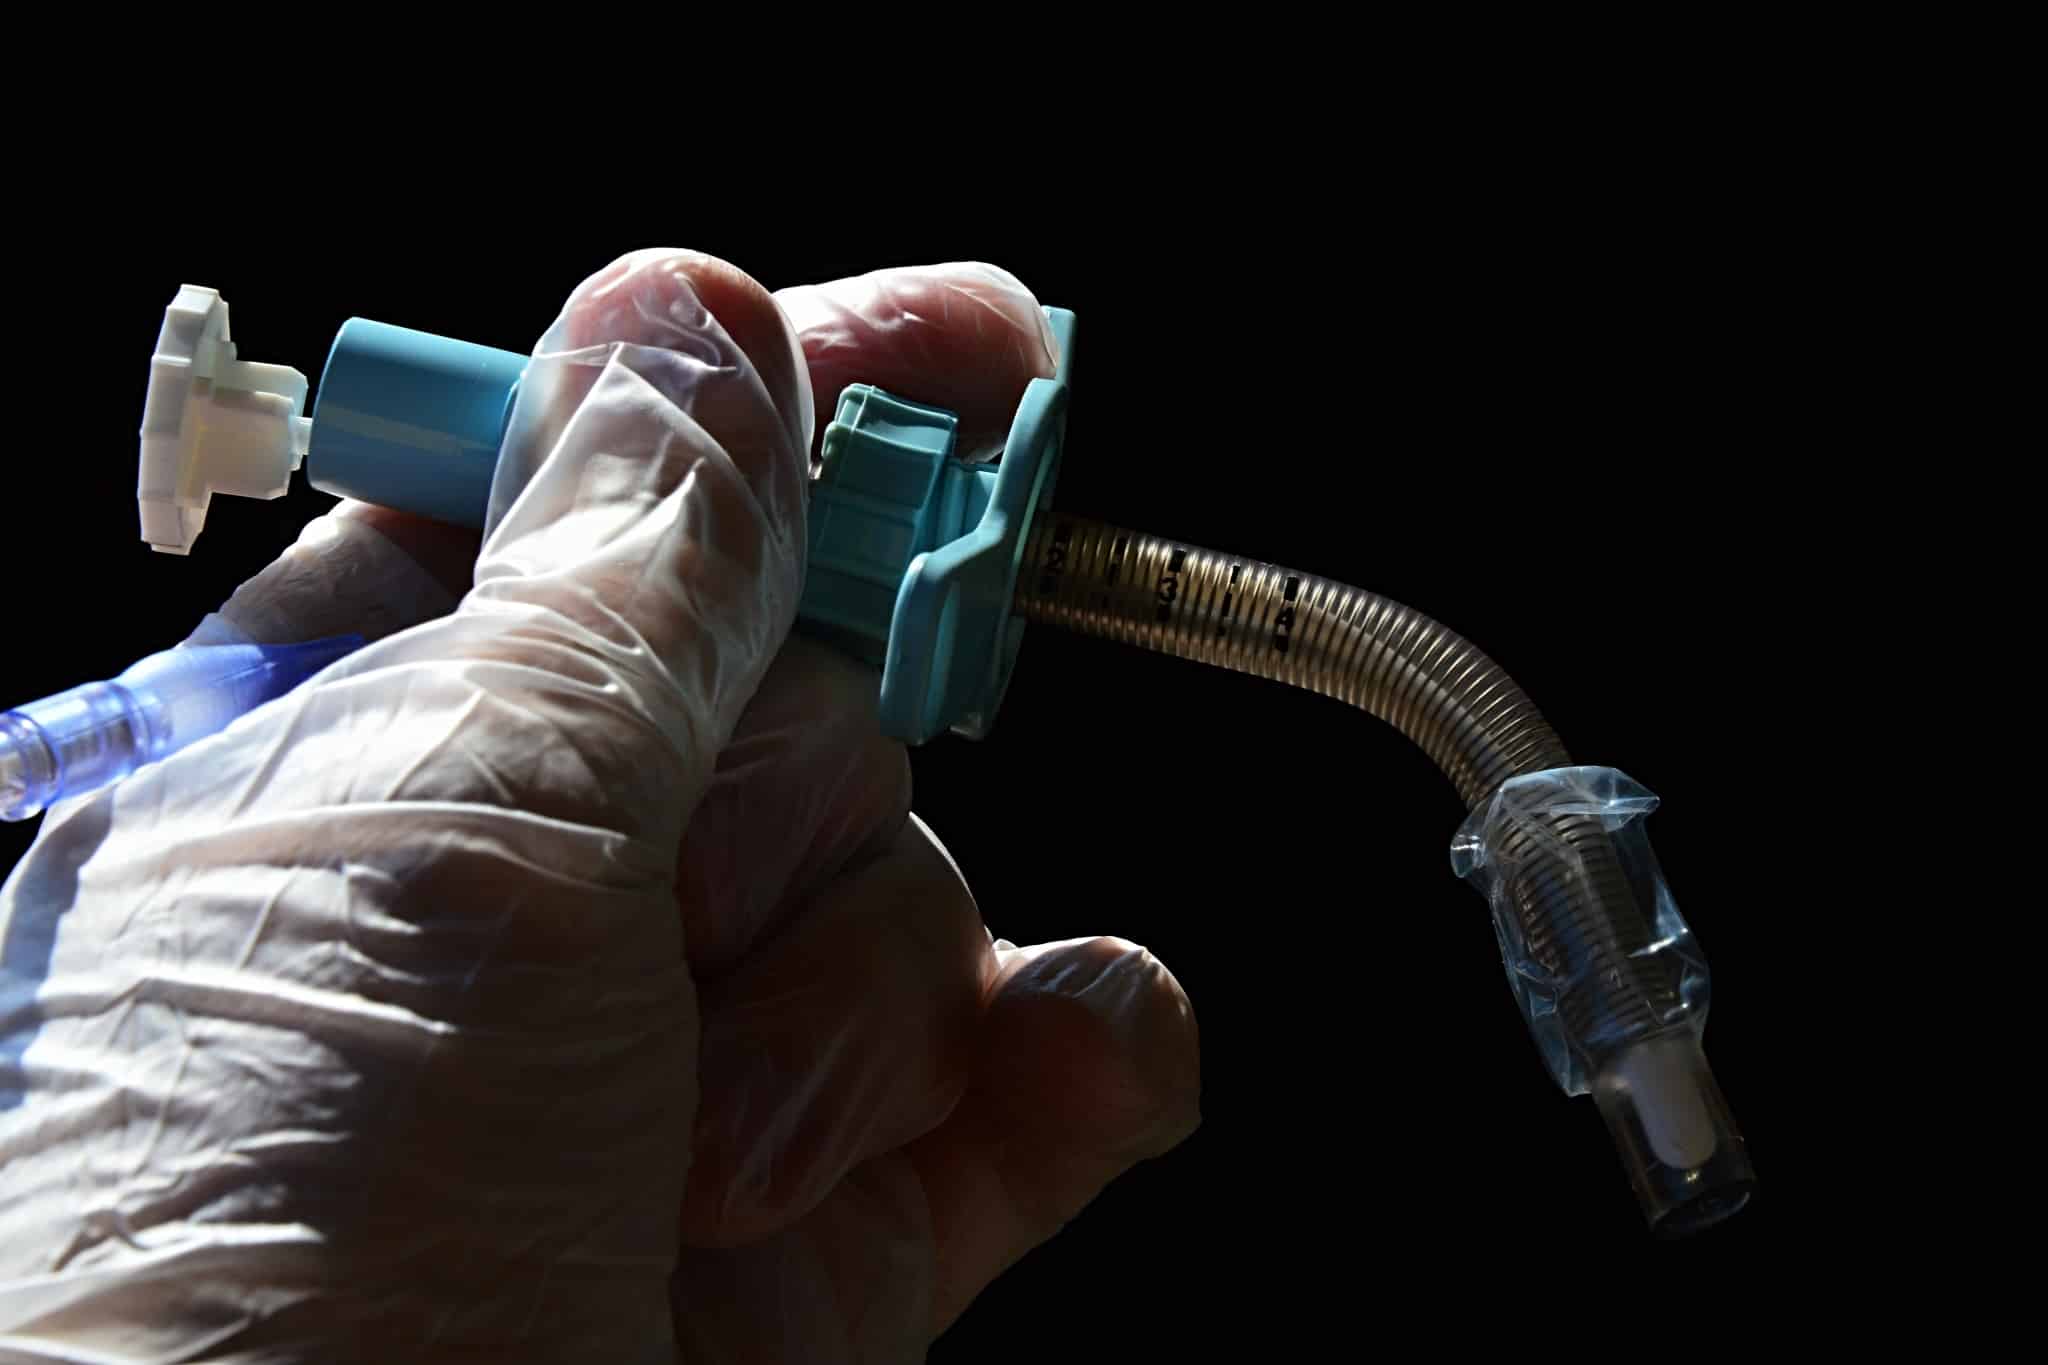
Changing the Inner Cannula
The inner cannula must be checked regularly and changed twice daily, once in the morning and again at night. If you see secretions building up inside, you’ll want to change it more often.
The tracheostomy system has an inner cannula in addition to the outer cannula because this allows the inner cannula to be removed and cleaned.
To change the inner cannula:
- Hold the outer cannula with one hand.
- With the other hand unlock the inner cannula by gently squeezing the pinch tab.
- Remove the inner cannula slowly, pulling outward in line with its curvature.
- Take the new inner cannula, gently squeeze the pinch tab, and slide it into the outer cannula.
- Release the pinch tab connector when you feel the new cannula lock into both sides of the connector rim.
- Don’t leave the inner cannula out of the tracheostomy tube for more than a few minutes.
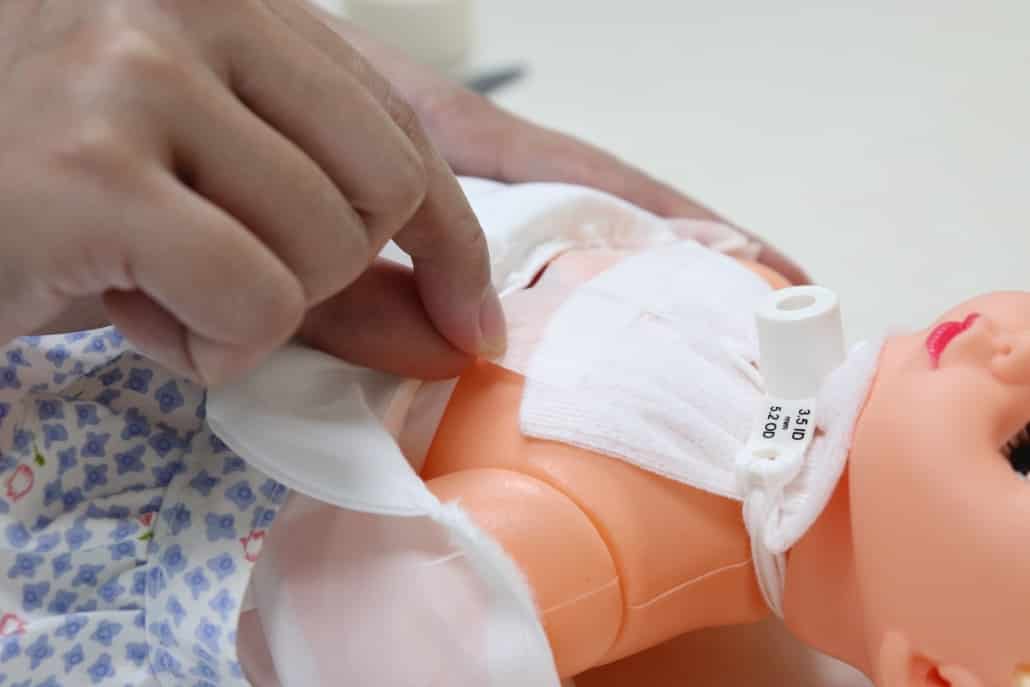
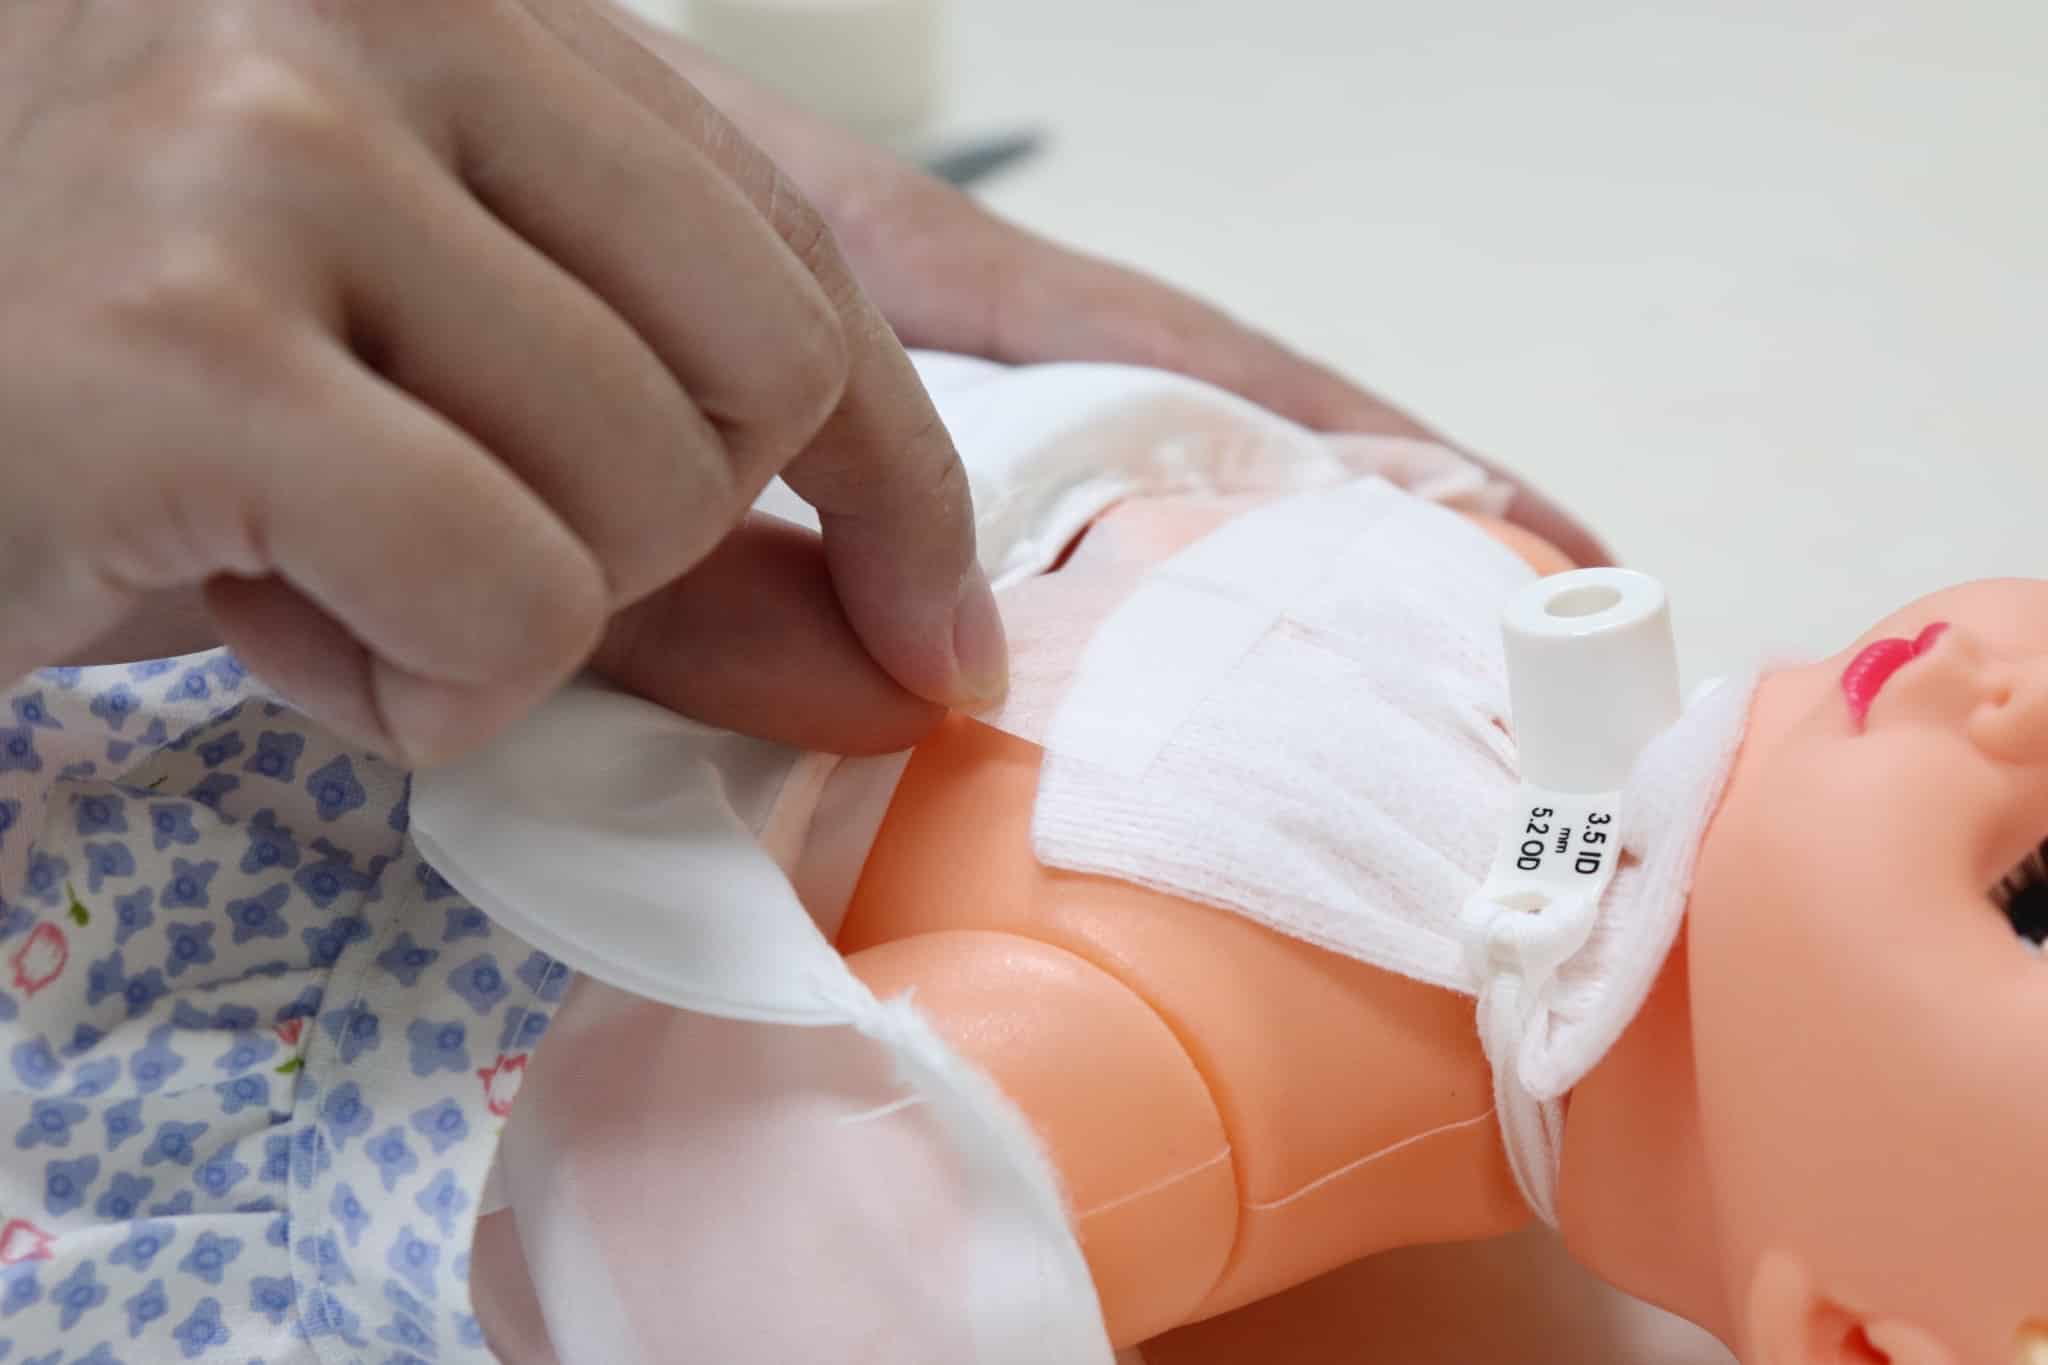
Cleaning the Skin Around Incision Site
- Clean the incision site using gauze or sterile applicators wetted with saline solution.
- If there are crusty secretions, you may want to use a 50/50 hydrogen peroxide/saline solution.
- Clean the flange of the tracheostomy tube with the same procedure.
- Use dry gauze squares to dry the tube flanges and the patient’s skin where you’ve cleaned.
Moisturizing the Air
Because the air entering the lungs through the tracheostomy cannot travel down the normal windpipe, it doesn’t receive the same humidification. The methods used to humidify the patient’s incoming air can vary with the patient and the facility. These may involve in-room humidifiers or vaporizers or a saline nebulizer. A head and moisture exchanger captures moisture from the air the patient exhales and humidifies the air they inhale. A more straightforward method involves placing a piece of gauze moistened with water on a string around the patient’s neck, allowing it to hang over the tracheostomy tube opening.
Recovery after a Tracheostomy
After a tracheostomy, the patient’s neck will be sore, and they may have difficulty swallowing for a few days. Getting used to breathing through the tracheostomy tube usually takes 2 to 3 days. After that, it will take longer to become fully accustomed to it. The nurse expedites this process by providing help with issues such as speaking and swallowing. For long-term patients, the nurse will also educate the patient on the care for the tracheostomy tube and surrounding tissues.
What Equipment is Required for a Tracheostomy?
The tracheostomy tube consists of the outer cannula and the inner cannula. An inflatable cuff is often used to secure the outer cannula in the trachea. A tracheostomy tie wraps around the patient’s neck and connects to the outer cannula. This keeps the tracheostomy tube in place.
Tracheostomy care involves typical sterilized supplies, a suction catheter kit, and additional inner cannulas.

What Are the Potential Risks or Complications with Tracheostomy?
The most common risk is an infection, but this is rare thanks to attentive nursing practices. Infection can be more of a problem for long-term tracheostomy patients who need to keep their tracheostomy parts and the surrounding skin clean.
Still, as with any medical procedure, there are risks. These are the potential complications:
- Subcutaneous emphysema
- Tube displacement
- Tube blockage
- Hemorrhage
- Tracheoesophageal fistula
- Swallowing problems
- Granuloma formation
- Scarring
Pro Tips for Tracheostomy Care
Following best practices helps to ensure the success of a tracheostomy.
- From the onset, describe the parts of the tracheostomy and their purpose to the patient.
- When changing the tracheostomy tube (if necessary), place a sandbag behind the patient’s neck at the base of the skull. Then, have the patient tilt their head backward, straightening the throat. This makes the insertion of the new tube much easier.
- Don’t apply suction for longer than 10 seconds; more extended periods can lead to shortness of breath.
- When changing the inner cannula, do this as quickly as possible to ensure secretions can’t build in the empty tube.
- Be constantly vigilant when looking for any signs of infection on the incision and the surrounding skin.
- When educating patients who will manage their tracheostomy at home, be thorough with your education and explanations. Encourage any questions the patient may have.
Are You Ready to Make the Move Into a Nursing Career?
Now you understand what’s involved in a tracheostomy and subsequent tracheostomy care. Tracheostomies often are life-saving procedures after a patient has suffered a traumatic injury. Tracheostomy care is one of the common duties performed by a nurse.
Are you interested in working with people and making a difference in their lives? A career in nursing not only satisfies that goal, but the projections for employment are excellent: there aren’t enough nurses to fill the available jobs.
Brookline College has multiple Nursing Programs to help you make a move into nursing. From accelerated programs to various tuition assistance options, we want to help talented people like you become nurses.
Share this entry.
While this blog may occasionally contain information that relates to Unitek College's programs or courses, the majority of information provided within this blog is for general informational purposes only and is not intended to represent the specific details of any educational offerings or opinions of Unitek College. *Please note that wage data provided by the Bureau of Labor Statistics (BLS) or other third-party sources may not be an accurate reflection of all areas of the country, may not account for the employees' years of experience, and may not reflect the wages or outlook of entry-level employees, such as graduates of our program. (accessed on 07/16/2026)