

Learn the procedures, steps, risks, and requirements of placing & removing sutures.
If a wound or incision is large, you’ll need sutures to close it. There are different types of sutures and techniques for closing a wound. The words “sutures” and “stitches” are often used interchangeably, but that’s inaccurate. A suture is the actual medical device used to repair a wound. Stitching is the technique used to weave sutures to close the wound.
Placing sutures is not the responsibility of the Registered Nurse. That’s because placing sutures is a minor surgical procedure that falls outside an RN’s scope of duties.
However, advanced practice registered nurses (APRNs) can suture patients. This is because APRNs have received advanced training and their scope of practice is much broader compared to an RN.
RNs are allowed to remove sutures once the wound has healed, although this can vary among different state boards of nursing.
In this article, we’ll get into the art of stitching a wound closed as performed by APRNs.
What’s the Definition of Stitching?
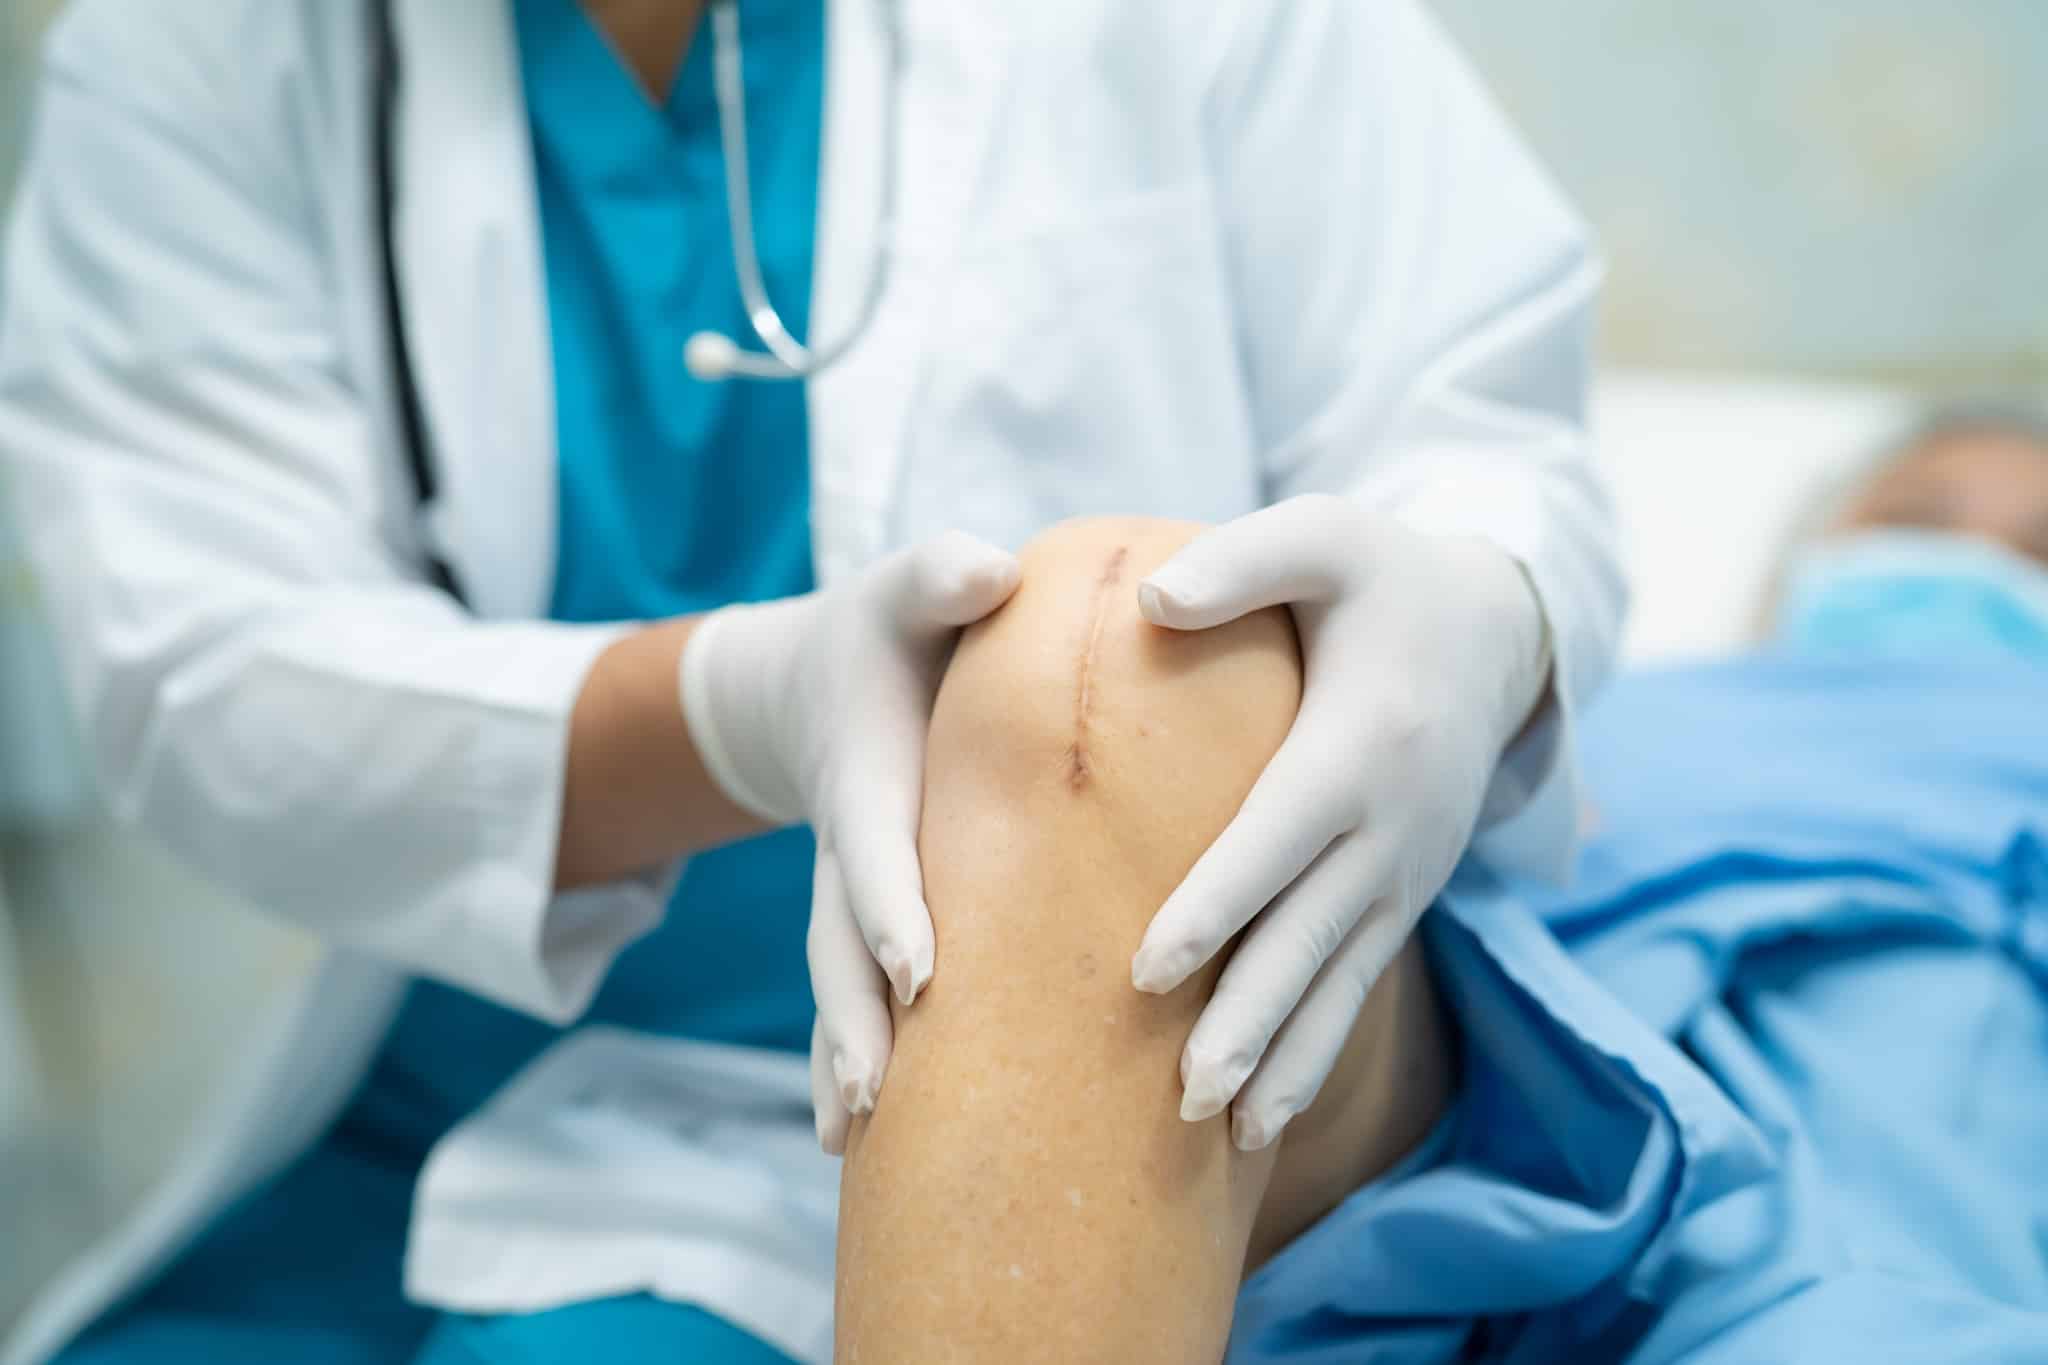
The primary goal of stitching or suturing is to bring together the wound’s margins and eliminate dead space between the wound walls and edges so that the underlying tissues are held together. When the two severed areas of tissue align and remain intact, the tissue can begin to repair itself and heal.
A secondary aspect of placing sutures is minimizing scar tissue formation at the wound site.
Sutures are the name of the medical device used in this process. Stitching or suturing is the term for the placement of the sutures to sew the wound closed.
What Are the Goals of Placing Sutures?
Of course, the primary purpose of placing sutures is to close a wound to begin the healing process and minimize its exposure to possible infection. Sutures aline the two severed edges, and the skin’s natural healing response begins.
Beyond closing the wound, the secondary goal is to minimize scar tissue. There are two reasons for this. First, scar tissue is weaker than normal skin tissue. Second, large scars are aesthetically unappealing.
There are two objectives when trying to limit the formation of scar tissue:
- Ensure the wound edges are not inverted during closure, meaning the epidermis on either side of the wound curls inwards and touches the epidermis on the opposite side. Inversion will delay and compromise the healing process and create an unsightly scar.
- Achieve the best wound edge approximation. This involves bringing the wound’s edges together as evenly as possible during suturing. There shouldn’t be any dead space or inversion.
How Long Does Suturing Take?
Stitching a wound closed takes only a few minutes. However, the time involved directly relates to the length of the wound and how many sutures are needed to close it. Sutures are placed on the epidermis, but for deeper wounds, the APRN or surgeon may also need to use “deep sutures.” These are placed under the outer tissue layers, providing more stability to the larger wound.
Who Places Sutures?
Stitching a wound is a “minor surgical procedure.†This distinction limits who may place sutures. Surgeons, physicians, and APRNs can place sutures in all states. In limited situations and usually under the supervision of an experienced physician, a registered nurse may be able to place sutures. This is rare, however.
In general, in the nursing world, stitching a wound is the domain of an APRN.
(Read about the typical duties performed by RNs.)

What Training is Required for Stitching?
Because stitching is a minor surgical procedure, this limits who can perform these procedures. An advanced practice registered nurse receives this training. There are four types of APRNs: nurse practitioners, clinical nurse specialists, certified registered nurse anesthetists, and certified nurse-midwives.
This is the training required to become an APRN:
- Earn a bachelor’s degree in Nursing.
- Pass the NCLEX-RN exam to become licensed.
- Gain work experience as an RN.
- Earn a graduate degree, either a Master of Science in Nursing (MSN) or a Doctor of Nursing Practice (DNP)
- Pass the national certification exam through any of five national certification boards.
Take the first step by enrolling in a BSN program.
What Equipment is Necessary for Stitching?
You’ll need a few items for placing sutures. Here is a list of the equipment:
- Needle holders look like long scissors without a sharp end. Instead, the end has grooves for holding items.
- Toothed forceps move the skin.
- Scissors cut the sutures.
- Suture thread comes in different materials (see below).
- Needles puncture the wound edge with suture thread.
What Are the Types of Sutures?
There are different ways to classify sutures. The first aspect is whether the suture is “absorbable†or “nonabsorbable.†Absorbable sutures don’t require removal. Over time enzymes in the body break down and digest these sutures once the wound has healed. Nonabsorbable sutures will need to be removed later by the APRN or doctor. In some deeper sutures, these will remain in place permanently.
The second way to classify sutures is by the structure of the material. They can be either monofilament (consisting of a single thread) or braided (several threads braided together).
The third way to classify sutures is whether the thread is a natural or synthetic material. Here are some different types of materials used:
Types of absorbable sutures:
- Gut — The body reacts to this type of suture the most.
- Polydioxanone (PDS) — Good for soft tissue repair.
- Poliglecaprone (MONOCRYL) — Used to close skin wounds invisibly.
- Polyglactin (Vicryl) — This synthetic braided suture repairs hand and facial lacerations.
Types of nonabsorbable sutures:
- Nylon — A natural monofilament suture
- Polypropylene (Prolene) — A synthetic monofilament suture
- Silk — A braided, natural suture
- Polyester (Ethibond) — A braided synthetic suture

How Is Stitching Done?
Step-by-Step Guide
Suture thread is graded by its diameter. This system uses the letter “O†preceded by a number to indicate the material’s diameter. The higher the number, the smaller the diameter of the suture thread.
The needles that thread the suture through the skin can have different features. They are generally curved and can have a cutting or noncutting edge. Larger needle sizes can close more tissue with each stitch, while smaller needles will likely create less scarring.
There are many types of suturing techniques. Here are some of the most common suture techniques used:
- Continuous sutures — With this method, a series of stitches use a single strand of suture thread. This type of stitching can be quickly placed. It’s also strong since the tension across the wound is distributed evenly throughout the continuous suture strand.
- Interrupted sutures — This uses a series of suture strands. After the APRN makes a stitch, the material is cut and tied off. Then the next stitch is placed and tied off, etc. This makes for a securely closed wound because if one of the stitches breaks, the remainder of the stitches will be unaffected and will continue to hold the wound closed.
- Deep sutures — Deep sutures close the lower part of the wound for larger, deeper wounds. These stitches go beneath the skin and may be continuous or interrupted.
- Buried sutures — As the name implies, the knot is beneath the closed-off area with these sutures. This type of suture is typically not removed.
- Purse-string sutures — This technique places a continuous suture around an area and tightens much like the drawstring on a bag. This method could be used in a patient’s intestines to secure an intestinal stapling device.
- Subcutaneous sutures — These sutures are placed in the dermis, the skin’s second layer beneath the outer epidermis. Short stitches are placed in a line parallel to the wound. The stitches are then anchored at either end of the wound.
Working with suture thread, needle holders, and forceps takes lots of practice. It’s part of the extensive training for becoming an APRN. (Learn about APRNs from the American Nurses Association.)
What Prep Is Necessary Before Stitching?
The wound and surrounding skin must be prepared with antiseptic solution before placing a drape around the area. In addition, the APRN needs to wash their hands and wear sterile gloves.
Wash the wound and any ragged or dirty edges of skin.
Load the needle holder by placing the needle on the tip of the holder.
Plan the entry and exit of the suture on either side of the wound. The placed sutures should lie perpendicularly across the injury with equal depth and distance from the wound edge.
Here Are the Basic Steps for Simple Interrupted Sutures
These are the steps for placing a simple interrupted suture.
- Gently lift the skin with forceps and pierce the skin surface with the needle at a 90-degree angle to the skin, approximately 4mm from the wound edge.
- Bend your wrist backward so the needle passes through the dermis and rises out of the middle of the wound.
- Use your forceps to hold the needle while you release the needle holder.
- Re-grasp the needle in the same place with the needle holder.
- Lift the opposing skin edge gently with your forceps.
- Now the needle needs to travel perpendicularly through the dermis from the inside to the outside. Use the curve of the needle and your wrist to move the needle through the skin. The distance should be the same as on the entry side.
- Use the forceps to grasp the needle and pull it through the skin. This will follow the needle’s curvature as it travels through the skin, drawing the suture through as you go.
- To tie the knot, put down the forceps and pull the suture so there is approximately 3cm of length on the opposing side.
- Hold the suture in your non-dominant hand and the needle holder in your dominant hand.
- Loop the suture away from you around the needle holder twice, then grasp the suture end with the needle holder. Next, pull the needle holder towards you and push your non-dominant hand away to lay the first knot.
- Let go of the suture with your needle holder but keep holding it with your non-dominant hand.
- Loop the suture back towards you around the needle holder once and grasp the suture end with the needle holder. Then, push the needle holder away and bring your non-dominant hand towards you to lay the second knot.
- Loop the suture away from you around the needle holder once, then grasp the suture end with your needle holder. Pull the needle holder towards you and push your non-dominant hand away to lay the final knot.
- Once the knot is tied, use the needle holder to pull the knot to one side so it is not overlaying the wound.
- Cut the suture between 5-6mm in length.

What is the Recovery from Sutures?
The closed wound is washed and dried. Next, place gel such as Neosporin over the stitched area and cover with a bandage. A compression bandage will be used for the first dressing in large, stitched wounds to help apply pressure onto the newly repaired area.
Most initial dressings stay on for 24 to 48 hours before changing. At that point, the patient will remove the dressing, gently cleanse the wound with soap and water, dry the injury, and apply topical gel and a new bandage.
This process will continue until the APRN or RN removes the sutures. Removing sutures is a simple process. After sterilizing the area, the APRN or RN picks one end of the suture and cuts it. The suture strand is then gently pulled out. If this is a continuous strand, the process ends. If it is an interrupted strand, the process repeats with each stitch.
According to the American Family Physician, these are general guidelines for suture removal:
- Scalp = 7 to 10 days
- Face = 3 to 5 days
- Chest or trunk = 10 to 14 days
- Arms = 7 to 10 days
- Legs = 10 to 14 days
- Hands or feet = 10 to 14 days
- Palms of the hands/soles of the feet = 14 to 21 days
What Are the Potential Risks or Complications with Suturing a Wound?
Stitching a wound closed is a necessary step toward healing. There isn’t an alternative, although for some injuries, the nurse or surgeon may be able to use skin glue instead of sutures. That’s not the case for deep or large wounds, however, as they require the strength provided by sutures.
There are two main potential problems—infection and improper wound healing. There may be an infection if the stitched area becomes a vivid red and there is oozing or pus. Antibiotics can treat this.
Although not dangerous like infection, wounds can also heal unevenly. The healed wound may be wavy or the sides uneven. This is an aesthetic issue corrected with subsequent minor surgery.
Pro Tips for Mastering the Art of Stitching?
Training in suturing is a part of the continued education required for a nurse to become an MSN or DNP. Practice is vital to learn the various techniques and how each responds to different wound types and sizes. Also, different approaches tend to work better for different people depending on the size of their hands and fingers, along with other variables. The goal is a fully healed wound with minimal scarring.
Here are four pro tips important for placing sutures successfully:
- Make sure your distance from the edge of the wound is the same on both sides. This includes the distance from the edge and the depth of the bite. The skin edges will not meet evenly if the two sides are not equal. This can leave an unsightly scar.
- Sutures placed should lie perpendicularly across the wound.
- Knots should not lie over the wound.
- Stitches need to be placed equally along the length of the wound.
Are You Ready to Make the Move Into a Nursing Career?
Those are the basics of closing a patient’s wound with sutures. Stitching is an essential skill for an advanced practice registered nurse (APRN).
If you are looking for a fulfilling job, you may be considering moving into nursing. At Brookline College, we specialize in helping our students get into nursing and other healthcare roles while still working in their current careers. Learn about your Nursing Program options.
Share this entry.
While this blog may occasionally contain information that relates to Unitek College's programs or courses, the majority of information provided within this blog is for general informational purposes only and is not intended to represent the specific details of any educational offerings or opinions of Unitek College. *Please note that wage data provided by the Bureau of Labor Statistics (BLS) or other third-party sources may not be an accurate reflection of all areas of the country, may not account for the employees' years of experience, and may not reflect the wages or outlook of entry-level employees, such as graduates of our program. (accessed on 07/15/2026)